


How to Hike Angel's Landing
A guide for the average hiker
I almost talked myself out of hiking Angel’s Landing.
I spiraled down a rabbit hole of Reddit threads and freaked myself out watching 360 camera angles. But I’m here to tell you, it’s not that bad.
I’m breaking it all down below so you can go in confident and prepared, and enjoy your hike. It’s worth it.
A few caveats—if you are afraid of heights, a novice hiker, or don’t secure a permit, don’t do the chain section. More on that below.
Here’s what you need to know:
Permits
You only need a permit for the chain section of the trail (last 0.5 miles). To get a permit you can enter either the Seasonal Permit Lottery or Day Before Permit Lottery.
Note that both are lotteries, so you aren’t guaranteed a permit. You will need an account with recreation.gov to enter either lottery.
Take a screenshot of your permit to show the rangers at the start of the chain section. There is no service on the hike, and they were strict about checking permits in my experience.
Seasonal Lottery
If this is a must-do hike for you, start with the seasonal lottery. You will get to pick seven ranked days and times or windows of days and times you want to hike.
It costs $6 to apply for a seasonal permit. The fee covers an application for up to 6 people (including the person filling out the application). This fee is non-refundable.
If you score a seasonal permit, you will then be charged $3 for each person on the permit.
The current seasonal lottery:
Hike Dates: December 1 to February 28, 2025
Lottery Opens 8 a.m. MT: October 1, 2024
Lottery Closes 11:59 p.m. MT: October 20, 2024
Permits Issued: October 25, 2024
Day Before Lottery
We missed the window for the seasonal lottery, but all four of us snagged permits in the day before lottery (one permit covers 6 people, so we ended up with extras).
This lottery opens every day at 12:01 am and closes at 3 pm MT. So, if you want to hike on Tuesday, you need apply during this timeframe on Monday.
If you get a permit, you’ll be notified via email by 4 pm MT. Your permit will be good the following day.
The day before lottery also costs $6 per application, then $3 per person if you get a permit.
Timeframes
In August 2024, there were two time options for this permit lottery: Before 9 am or after 9 am. The time refers to your start time at The Grotto trailhead.
If you have a before 9 am permit, start your hike as early as possible. It gets hot and crowded fast, so this is your best bet to avoid both.
If you have an after 9 am permit during the summer, consider starting your hike around 4 pm. The trail will be shadier by this time and the crowds will have thinned out considerably.
What to Pack
Backpack: You’ll want your hands free on the chains. Secure everything in your backpack before you head up. I recommend using a backpack with chest and hip straps to better distribute weight. I have an REI 22 Liter Flashpack.
Water: Bring 1 liter per hour of hiking. I had a 2 liter water bladder, 16 oz Nalgene, and 2 16 oz plastic water bottles with Liquid IV, plus a 40 oz water bottle in my bike basket at the trailhead.
Food: Bring salty snacks to help replenish the salt you lose sweating and the calories you burn. I brought 2 Cliff bars, 2 Uncrustables, trail mix, and beef jerky.
Sun protection: Non-negotiable! I brought a baseball hat, bucket hat, sunglasses, sun hoodie, and sunscreen. I reapplied sunscreen at Scout Lookout.
First aid kit: Always have a first aid kit with the 10 essentials.
Landmarks
Ok let’s get into the actual hike! Look for these landmarks along your way and you’ll reach the summit in no time.
The Grotto
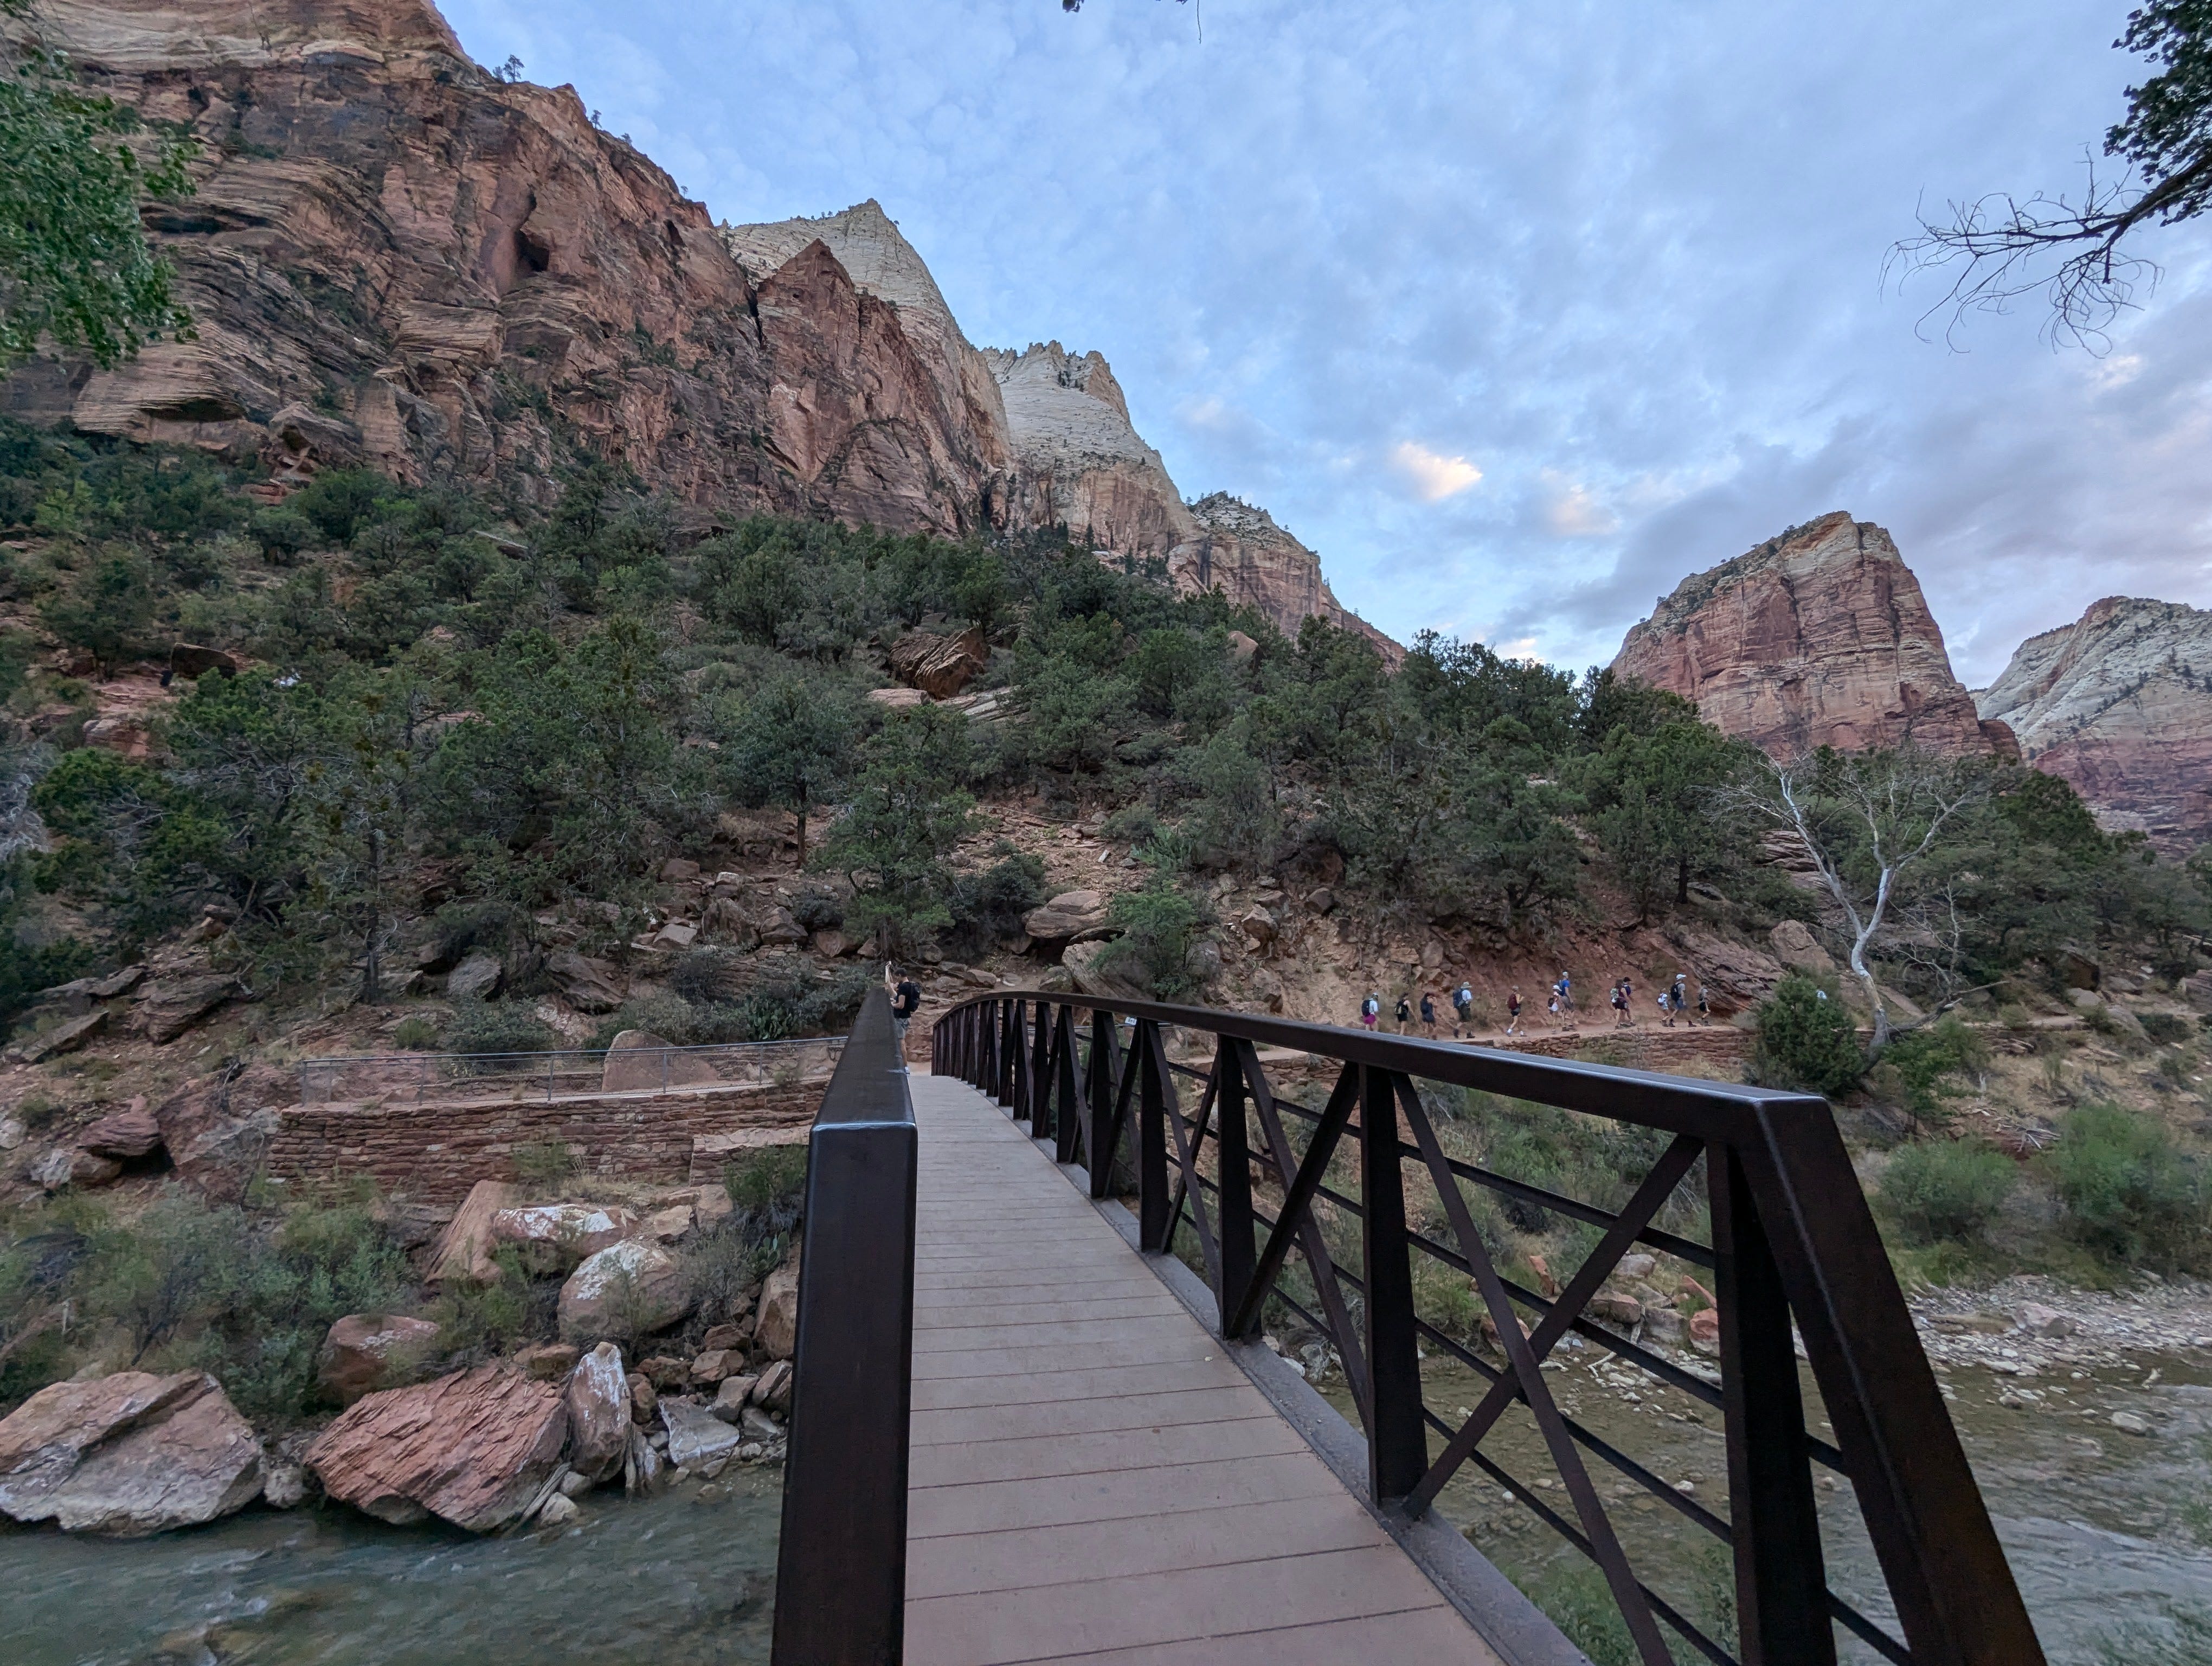
Start the hike at The Grotto trailhead (we started around 6:50 am). There are bathroom and water stations here (the last chance to fill up water before the hike).
That outcropping of rock on the righthand side of the picture is your destination: Angel’s Landing.
Cross the bridge and you’ll soon start up your first switchbacks. Walter’s Wiggles come later, but these early switchbacks are longer and have little shade.
Refrigerator Canyon


A much needed break after those switchbacks. This section is relatively flat and is shaded almost all of the time with a cool breeze through the canyon.
Keep your voice down in this section. Mexican spotted owls nest here (we heard them on our way down!).
Walter’s Wiggles


Breaks over. Walter’s Wiggles are 21 short, steep switchbacks that quickly take you up 250 feet in elevation.
This section looks intimidating, but I actually found these more manageable than the earlier, longer switchbacks. At the top you are rewarded with a larger, flat area called Scout Lookout.
Scout Lookout


Stop here if you didn’t secure a permit or are afraid of heights. My sister fell into the latter group, so she waited here while the rest of us continued up the chains.
It took our group between an hour and an hour and 20 minutes to reach this spot. We stopped for a while for lunch and reapplied sunscreen before continuing on. We started the chains around 8:30 am.
There are also bathrooms in this area and another trail with a canyon view if you are skipping the chains.
The Chains


This is it!
Think of the chains as staircase railings. They are there for balance, but don’t rely on them to fully support your weight. They do move.
I tried to keep three points of contact at all times—one hand on the chains and my two feet on the ground. There were a few areas where I had to put both hands on the rock or the post to push myself up. I’m about 5’4” for reference.
This section is narrow, but not as bad as I was expecting. The stone is solid and I didn’t experience many loose stones. Keeps your eyes on the trail and don’t rush.
It is two-way traffic. If you have room, move over and let people pass you. Expect to stop often to let others by and be courteous as you pass by others. You got this!
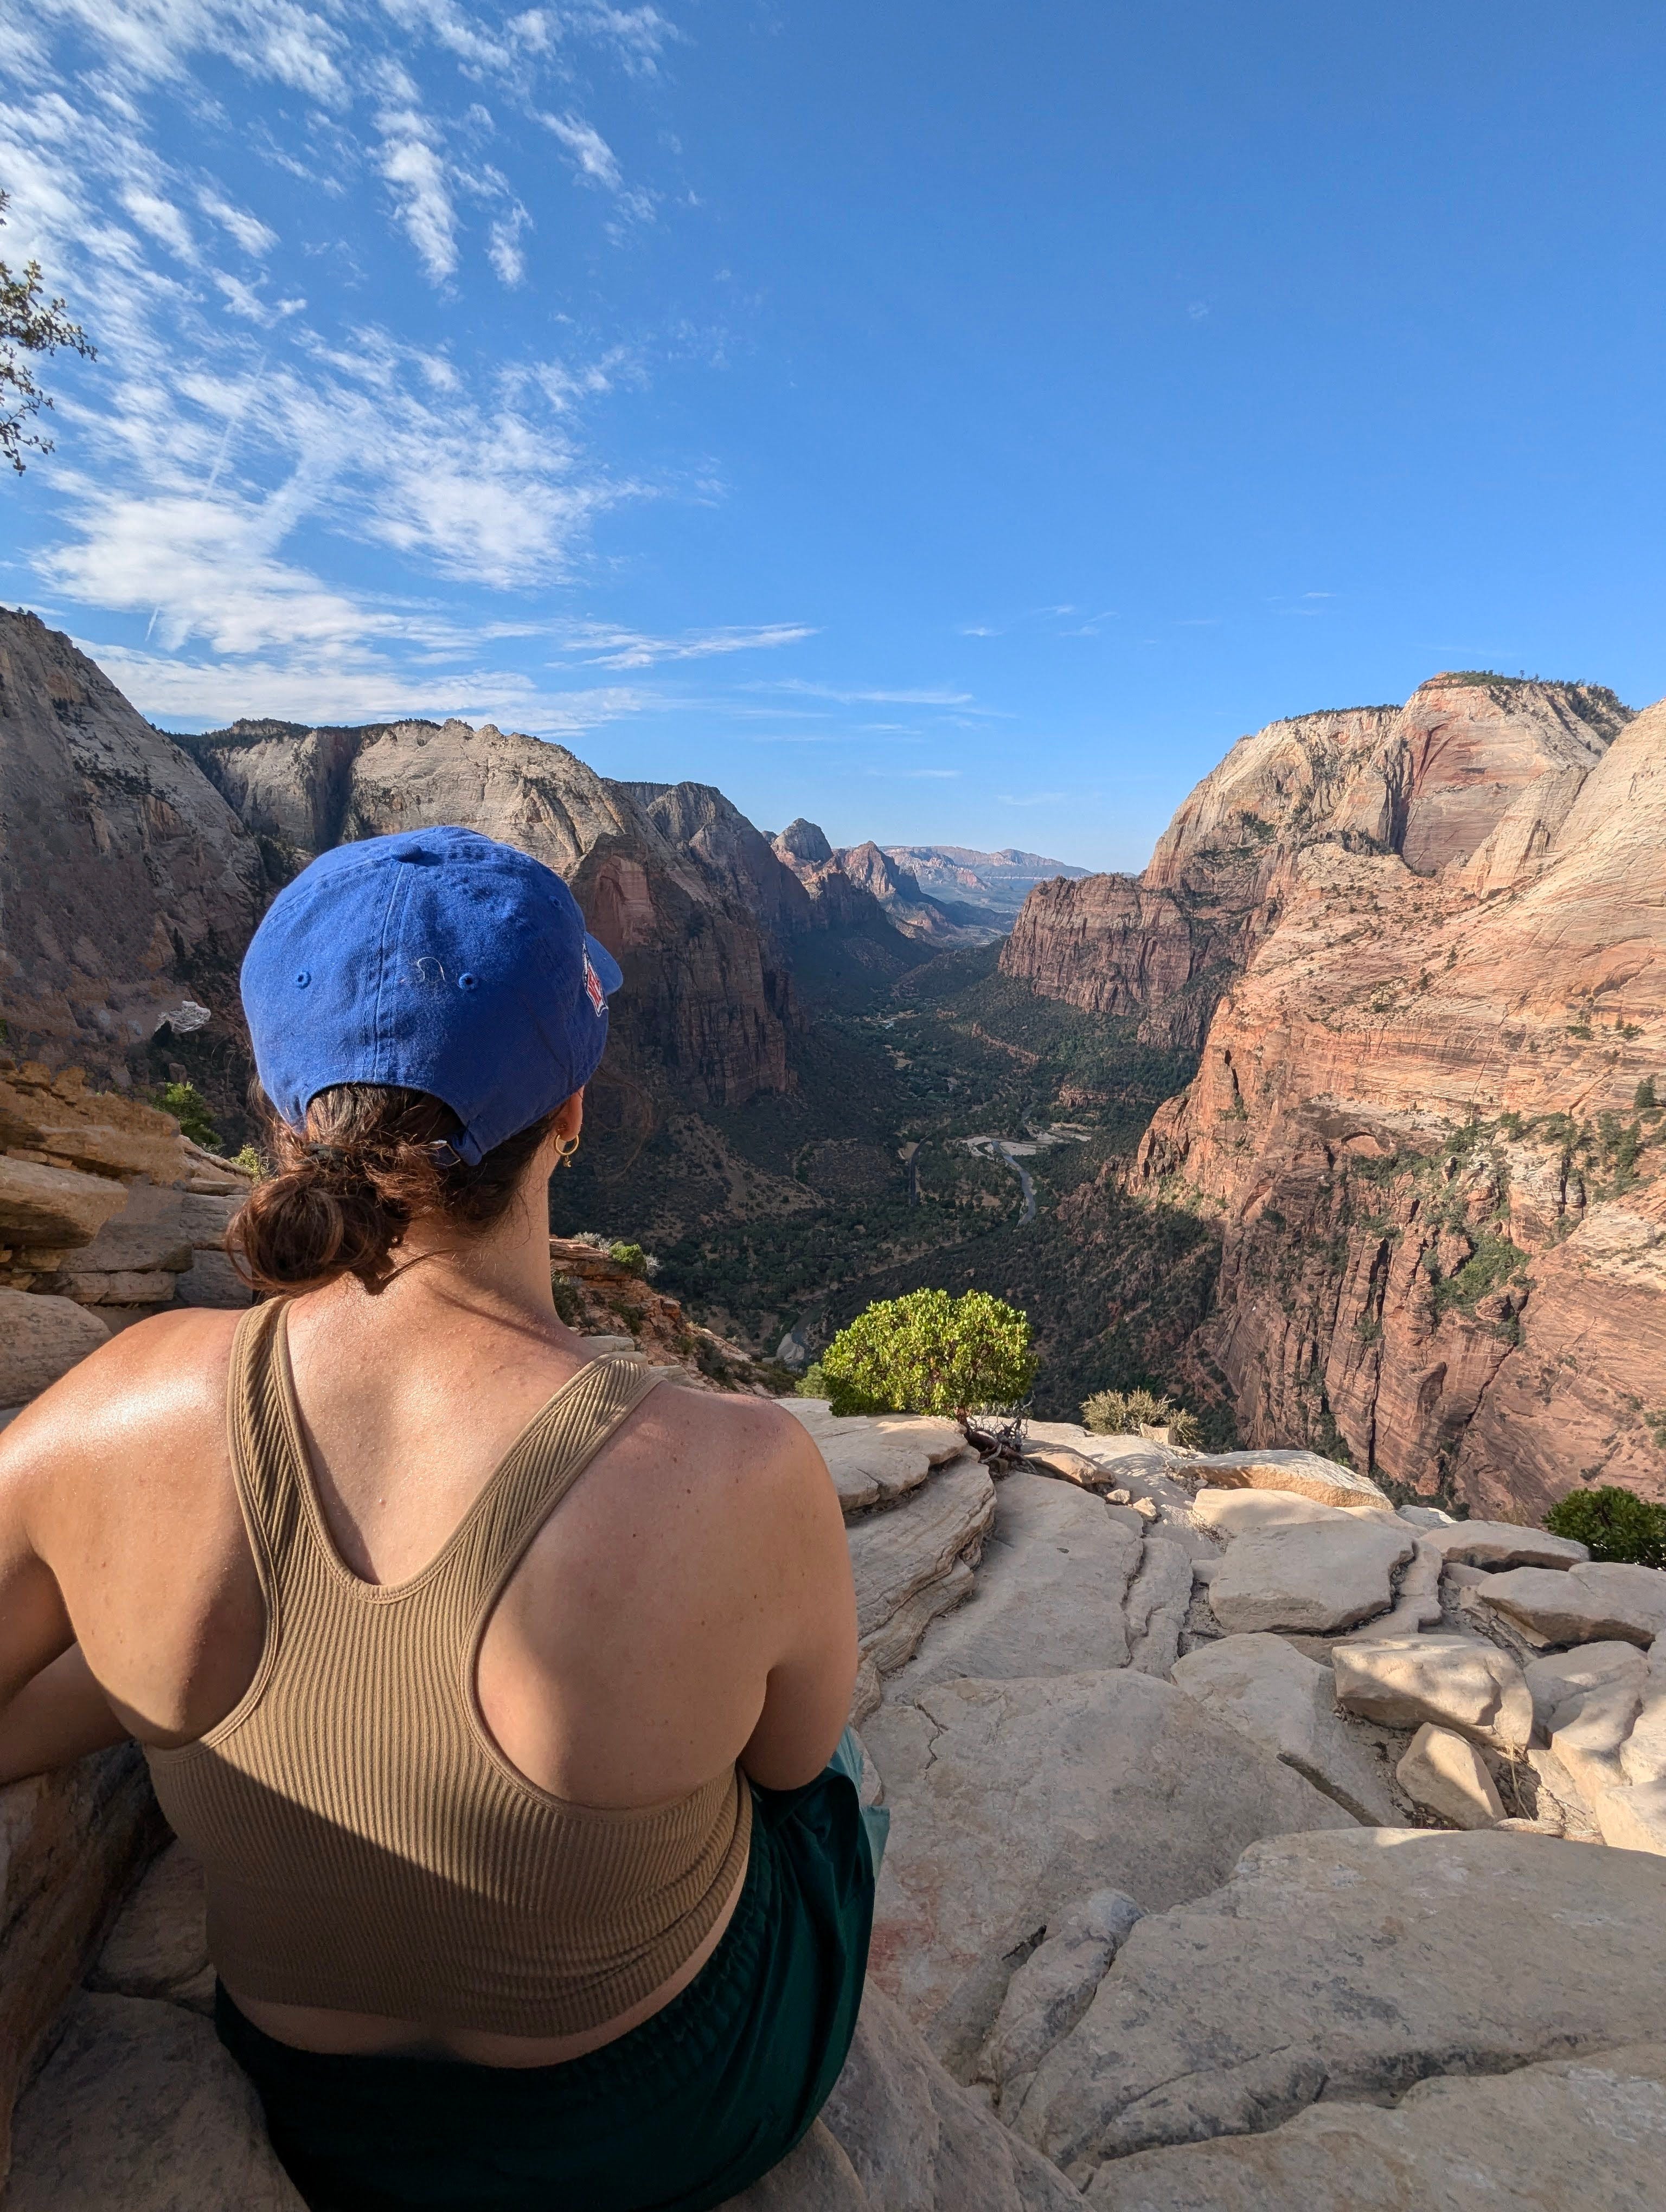
Angel’s Landing


Once you get over the final climb, the summit opens up and flattens out. There is a lot of room up here, so find a spot with a nice view and enjoy.
We stayed up top for about 30 minutes and then made our way back down the chains.
Follow the same rules on the way back. My quads were burning on the switchbacks down. If you have trekking poles, that’s the place to use them. Otherwise, I did a light jog to help take the pressure off my knees.
Here are my Strava stats if that’s helpful. Our total elapsed time was 4:54:38.


Was it worth it?
All in all, I wasn’t scared on the chains and the views were worth it. If you have an average hiking background and some experience hiking with cliff exposure, you’ll likely feel the same way I did. Get out there and enjoy it!